

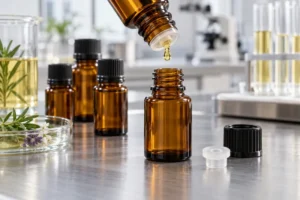
Die kurze Antwort: an essential oil bottle usually stops dripping because the oil cannot leave through the reducer fast enough, or replacement air cannot enter the bottle. The most common causes are a covered or blocked air-return channel, dried or oxidized residue, an oil that is too viscous at the current temperature, an insert that is deformed or incorrectly matched to the neck, and a reducer orientation that does not suit its design.
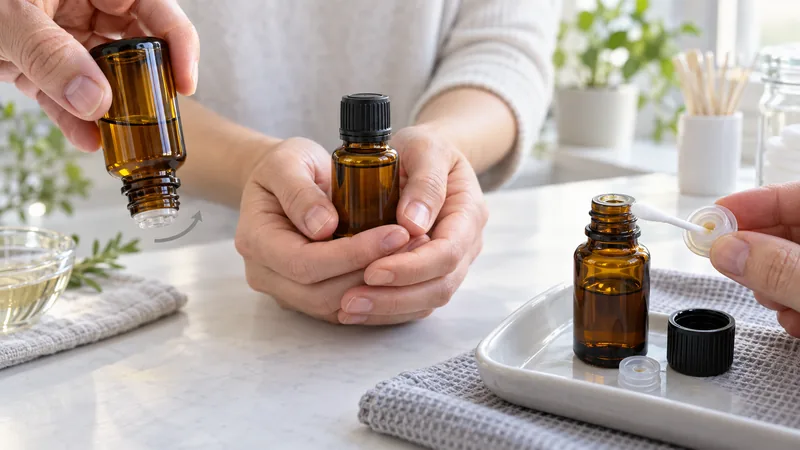
First, hold the closed bottle in your hands until it reaches normal room temperature. Then invert it fully for 5–10 seconds and rotate it slowly so the reducer’s air path can clear. Wipe visible residue from the outlet with a lint-free tissue. Do not enlarge the hole with a pin, microwave the bottle, expose it to flame, or dilute the product unless the formula owner authorizes it. If crystals, an unusual odor, discoloration, leakage or a damaged insert are present, stop using the package and replace or investigate it.
This guide covers bottles fitted with plastic orifice reducers, often called euro droppers, dropper plugs or flow restrictors. Pipette droppers, rollerballs and treatment pumps use different mechanisms. A “drop” is not a universal unit of medical dose; follow the product label and applicable safety instructions.
Why an essential oil bottle needs two flow paths
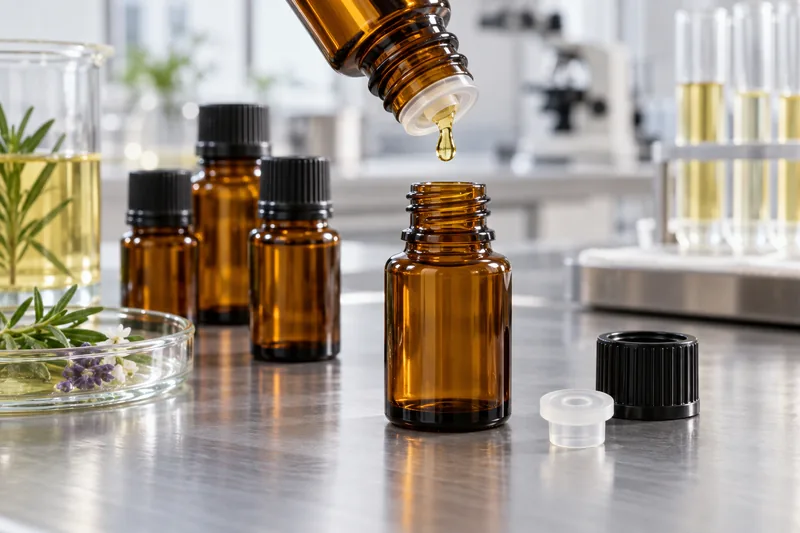
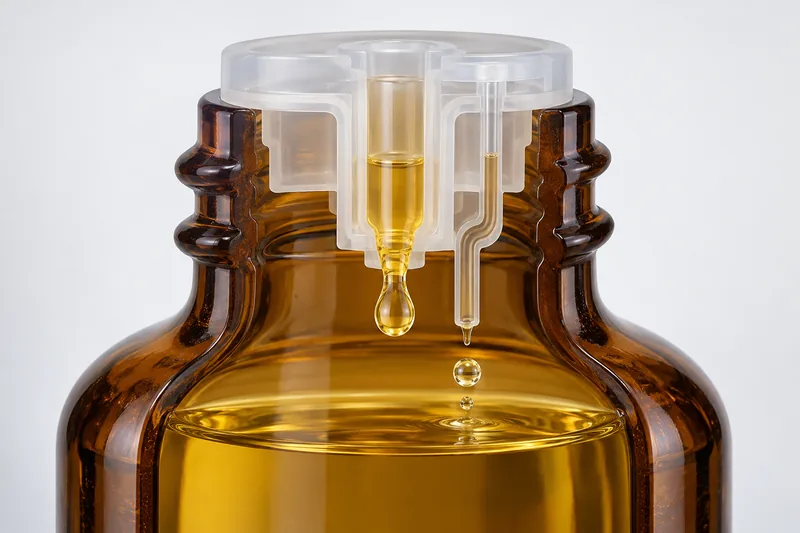
A reducer is not simply a small hole. In normal dispensing, one passage allows oil to leave and another allows air to enter. As each drop exits, the internal liquid volume decreases. If an equal volume of air cannot return, pressure inside falls and opposes gravity. Flow slows, stops, then may restart with a bubble or “glug” when air finally enters.
Reducer designs differ. Some have a side liquid opening and central air stem; others meter through a central outlet with a side air path. The best rotation therefore is not universal. With the bottle inverted, rotate it gradually and observe which position produces stable drops. If the product dispenses only after a bubble enters, an air-return restriction is more likely than an empty bottle.
The four physical factors behind the drip rate
- Viscosity: thicker liquid resists movement. Temperature and formula composition can change viscosity substantially.
- Surface tension and wetting: the oil must detach from the outlet as a drop. Different formulas wet the insert differently.
- Geometry: outlet diameter, passage length, vent area, edge shape and reducer orientation all matter—not diameter alone.
- Pressure balance: gravity pushes liquid toward the outlet while air entry prevents a persistent partial vacuum.
Poiseuille-type flow relationships correctly suggest that small geometry changes can strongly affect resistance, but a short orifice handling two-phase air/liquid flow is not a long straight capillary. A calculation cannot replace a test with the actual oil, production insert and bottle.
A safe troubleshooting sequence for a bottle that will not drip
- Confirm the package is open and contains mobile liquid. Remove only the intended tamper-evident closure. Do not pry out the reducer merely because it is visible.
- Check the outside. Look for a cracked cap, a lifted insert, oil around the neck, a blocked outlet, crystals or foreign particles. Quarantine a leaking or visibly contaminated unit.
- Condition at room temperature. Hold the bottle in your hands or let it stand in a normal indoor environment. Never use a microwave, boiling water, open flame or uncontrolled heat.
- Invert and wait. Hold the bottle completely upside down for 5–10 seconds. A partially tilted bottle can keep the intended air passage submerged.
- Rotate slowly. Turn the inverted bottle through several positions. A reliable position identifies an orientation-sensitive vent rather than a permanently blocked outlet.
- Clean only the accessible surface. Wipe the reducer and bottle rim with clean, lint-free material. Do not use a sewing needle, drill or toothpick: it changes the metering geometry and may introduce fragments.
- Follow the supplier’s component instructions. If the insert is designed to be removed and reused, use the correct removal tool, clean it separately by the approved method, and let it dry completely. If no validated cleaning instruction exists, replace the reducer or complete closure.
- Escalate abnormal product changes. Sediment, unexpected thickening, crystallization, unusual odor or color change may indicate formula instability, oxidation or contamination. Do not force the material through and assume the package is the only problem.
Essential oil bottle not dripping: symptom, cause, test and fix
| Beobachtetes Fehlerbild | Wahrscheinliche Ursache | Discriminating check | Korrekturmaßnahme |
|---|---|---|---|
| Starts after rotation or a visible air bubble | Air-return path is submerged, too small or partly blocked | Compare several orientations | Document the correct orientation; for production, select a reducer with adequate vent geometry |
| Works warm but stops when cold | Viscosity rise or crystallization | Condition matched bottles at controlled cold and room temperatures | Change reducer geometry or dispenser; define storage/use range |
| New bottle never flows | Wrong insert, blocked molding feature, over-insertion or neck mismatch | Compare component code, cavity and neck dimensions with an approved unit | Contain lot; correct component or assembly process |
| Flow deteriorates during use | Dried residue, oxidation product, crystals or particles | Inspect residue and compare fresh and aged packs | Improve closure/storage; filter only if formulation permits; reassess formula stability |
| One bottle fails; others work | Local contamination, damaged insert or cavity-specific variation | Trace bottle and insert cavities; inspect retained units | Segregate affected cavity/lot and expand sampling |
| Whole lot flows slowly | Formula/reducer mismatch, cold exposure or process drift | Controlled comparison with approved lot and reference oil | Hold shipment; run root-cause study before rework |
| Oil pours or streams instead of drops | Outlet too large, missing/damaged insert, low-viscosity mismatch | Confirm reducer presence and measure flow mass/time | Replace with qualified reducer; do not rely on user tilt to control dose |
Does the essential oil itself cause the problem?
Yes—the package and formula form one dispensing system. Thin, highly mobile oils can run through a large outlet, while viscous, resinous or carrier-oil-rich blends may not pass through a small one. Vetiver-like, myrrh-like or heavily blended products often need a different reducer or a pipette, but a botanical name alone is not a specification. Source, composition, dilution, age and temperature can change behavior.
Particles, waxes and crystallizing constituents can obstruct a metering feature. Evaporation can leave a concentrated film at the exposed outlet. Oxygen, heat and light can alter essential-oil composition; oxidation may create heavier or polymerized residues. The practical response is not to assume every old blockage is “dirt,” but to compare fresh formula, aged formula and residue under controlled conditions.
Why there is no universal reducer hole size
Commercial suppliers offer several orifice diameters; one published vendor range, for example, spans approximately 0.55–2.0 mm. That is evidence that selection varies—not a rule that any particular oil requires a certain number. Outlet shape, vent area, insert material, temperature and target use rate change the result. Specify functional performance such as first-drop time and mass delivered over a defined number of drops, then lock the approved component drawing.
How temperature, altitude, light and storage affect dispensing
- Kälte: commonly increases viscosity and can encourage crystallization, so flow slows. Qualify the lowest credible use temperature rather than testing only at 23°C.
- Wärme: can temporarily improve flow but accelerates evaporation and oxidation and may deform polymer components. Uncontrolled heating is not a safe repair.
- Light and oxygen: chiefly affect formula stability over time. Dark glass helps reduce light exposure but does not stop oxygen entry or cure the wrong reducer.
- Altitude and pressure changes: can alter headspace pressure and transport leakage. They rarely explain a permanently blocked new bottle by themselves, but should be represented in distribution qualification.
- Luftfeuchtigkeit: is usually an indirect factor. It can contribute to water contamination after repeated opening and affect labels or cartons, but it is not normally the primary resistance inside an oil-filled reducer.
- Dust and storage position: dust can contaminate an open outlet; prolonged inverted storage keeps product at the reducer and can promote leakage or deposits. Store upright, closed, cool and dark unless the product instructions say otherwise.
Does bottle material matter?
The glass body is rarely the direct cause of no-drip performance; the glass neck can be. Neck inside diameter, sealing land, finish height, ovality and local molding variation determine how the reducer seats. Excessive interference can distort a flexible insert or restrict its air path. Too little interference can cause lift-out or leakage.
Amber, cobalt and clear glass differ mainly in light transmission and appearance, not in short-term gravity flow. Use the broader guide to select a bottle for essential oils, but qualify the complete bottle, reducer and cap as one system.
Plastic bottles may flex when squeezed and recover afterward, which changes pressure behavior. More importantly, the essential oil may swell, soften, stress-crack or permeate a polymer. Reducers are commonly molded from polyolefins such as PE or PP, but resin family alone does not prove compatibility. Grade, additives, oil composition, temperature and exposure time matter. Review the packaging compatibility protocol and test production-grade components with the market formula.
Choose the dispenser around use, not appearance
| Spender | Besonders geeignet für | Wesentliche Einschränkung |
|---|---|---|
| Orifice reducer | Low- to moderate-viscosity liquids needing simple dropwise delivery | Highly sensitive to viscosity, venting, orientation and deposits |
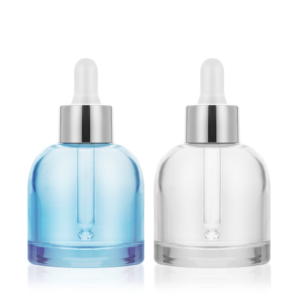
| Pipette dropper | User-controlled transfer and visual premium presentation | Dose still varies with technique, bulb recovery and formula; more component interfaces |
| Roll-on-Kugel | Topical oil blends applied directly to a small area | Ball fit and formula wetting determine roll; not suited to free drops |
| Feindosierpumpe | Repeatable larger output for compatible serum or carrier-oil blends | Valve compatibility, priming and output require a separate qualification |
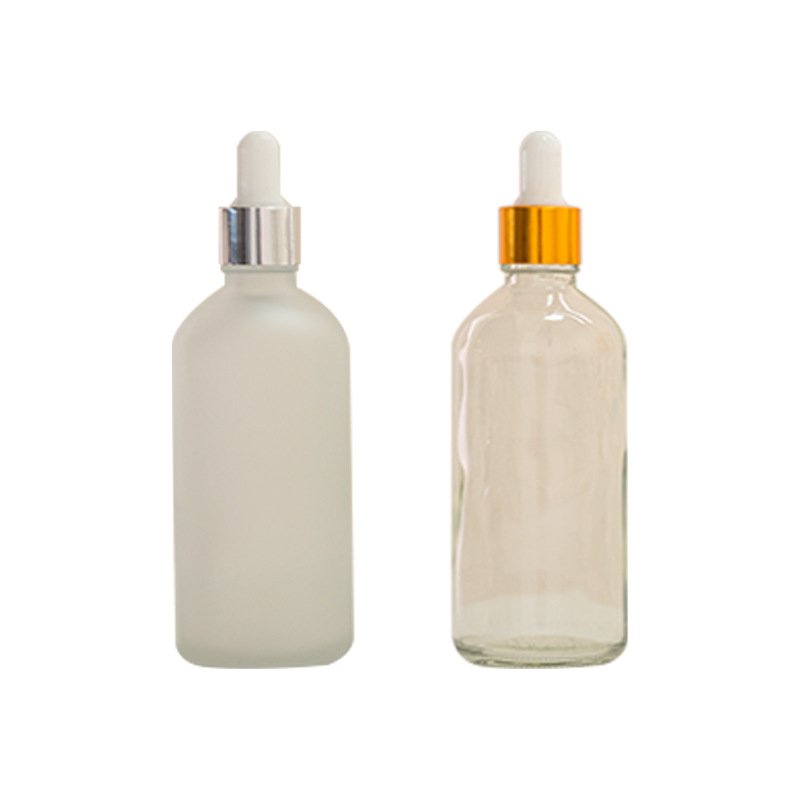
Das essential oil bottle category und dropper bottle systems show the available packaging families. A focused example is the 5–100 mL amber glass dropper bottle range. These are starting points: the exact closure, neck finish and formula still need project-specific approval.
How factories prevent no-flow essential oil bottles
A factory cannot prevent this defect by visually inspecting bottles alone. The control plan must connect formula properties, neck dimensions, insert molding, assembly and functional flow.
1. Define the use case and formula
Record formula version, viscosity at stated temperature and method, density, visible particle limits, anticipated storage temperatures, orientation, desired drip behavior and consumer use. Test the final commercial formula—not only water, mineral oil or an unnamed “standard oil.” A reference liquid may monitor equipment consistency, but it cannot approve formula performance.
2. Control bottle neck and reducer dimensions
Drawings should identify bottle neck inside diameter, sealing land, finish height, ovality and critical profile dimensions, plus reducer flange diameter, plug diameter, outlet/vent geometry and insertion depth. Track glass mold and reducer cavity. Measure components before assembly so a flow failure is not incorrectly blamed on filling.
3. Validate insertion and closure assembly
Specify insertion force or seating method, full-seat position, retention and cap application torque. An over-driven reducer may deform; a partly seated reducer may leak or lift out. Cap torque should be defined with the complete closure and monitored after conditioning. Boyu’s guide to setting bottle-cap torque explains why “as tight as possible” is not a valid specification.
4. Run a repeatable functional flow test
- Identify bottle, reducer and cap lot/cavity, formula batch, actual fill mass and headspace.
- Condition filled units for defined times at cold, room and elevated temperatures justified by distribution and use.
- Define inversion angle, reducer orientation, waiting time and whether the bottle may be tapped.
- Measure first-drop time, no-flow incidence and either mass of a stated number of drops or mass delivered in a stated time.
- Repeat at the beginning, middle and end of bottle life and after compatibility aging.
- Report mean, spread, individual failures and cavity/lot traceability. Do not hide zero-flow units by averaging only successful bottles.

5. Combine compatibility, leakage and distribution testing
Age filled packs in relevant orientations and temperatures, then inspect formula, reducer dimensions, swelling, softening, stress cracking, seating, flow and odor. Perform leakage tests with the complete closure system; the Leitfaden zur Dichtheitsprüfung von Kosmetikflaschen, covers vacuum, pressure, orientation and transport considerations. Use a distribution test selected for the real shipping system, not an arbitrary drop test alone.
6. Set acceptance rules and change control
There is no published universal limit that makes every essential-oil reducer acceptable. The buyer and supplier should agree on test temperature, orientation, first-drop time, permitted no-flow count, flow range, sampling plan and defect class. ISO 2859-1 can structure lot acceptance sampling, but it does not choose the functional limit or AQL for the brand.
Lock bottle drawing, reducer drawing, resin grade, mold/cavity identification, supplier, assembly method and test method. A change of resin, reducer supplier, mold, neck dimension or assembly process should trigger documented assessment and, where relevant, requalification with the commercial formula.
What to do when finished production does not drip
- Hold affected stock. Identify finished-goods lot, fill batch, component lots, cavities, line, shift and environmental exposure.
- Nachweise sichern. Keep unopened samples, failing opened samples and approved retain samples. Do not puncture every reducer before the investigation.
- Reproduce under controlled conditions. Test failing and approved units at the same fill, temperature, orientation and time.
- Separate package from formula. Use a documented cross-over: approved formula in suspect packages and suspect formula in approved packages. This narrows the root cause without pretending the reference liquid is market approval.
- Measure components. Examine outlet/vent obstruction, insert deformation, insertion depth, neck dimensions and cavity trends.
- Approve rework before execution. Replacing reducers can affect cleanliness, tamper evidence, leakage and compatibility. Document the rework method, resampling and release authority.
Häufig gestellte Fragen
Should I remove the plastic insert?
Not as the first step. It meters flow and may be part of the seal. Remove it only when the manufacturer says it is removable and gives an approved cleaning or replacement method.
Can I widen the hole with a pin?
No. A small enlargement can turn drops into an uncontrolled stream, damage the vent, introduce particles and invalidate dose or safety expectations.
Why does the bottle work in my hand but not in a cold room?
Hand warmth can lower viscosity or dissolve temperature-sensitive crystals enough to restore flow. That result identifies a temperature/formula/reducer mismatch; it does not prove the pack will work across the intended market conditions.
Why does the bottle dispense more slowly near the end?
The liquid may no longer cover the outlet consistently, a film may have accumulated, or the user angle may let air and oil compete for the same passage. Test beginning-, middle- and end-of-life performance rather than approving only a full bottle.
Will amber glass solve the problem?
Amber glass helps reduce light exposure, which can support formula stability, but it does not correct blocked venting, wrong outlet geometry, insert deformation or neck mismatch.
When should I switch to a pipette dropper?
Consider it when the formula cannot pass reliably through a suitable reducer, when controlled transfer is more important than a fixed gravity drip, or when the brand needs visible user dosing. A pipette still requires compatibility, dose-repeatability and leakage testing.
Qualify the complete bottle, not a loose component
For a new essential-oil package, send the actual formula or a technically representative sample, target temperatures, desired flow and fill process. Boyu Packaging can help compare bottle, reducer/dropper and cap options, but final approval should be based on documented tests of the production system.
Contact Boyu Packaging about essential-oil bottle testing and samples.
Quellen
Accessed October 15, 2026. Supplier documents are identified as examples; standards and peer-reviewed sources support the test and stability principles.
- Carow Packaging — Flow Rate Sheet (supplier example of viscosity and reducer-orifice selection).
- ISO 2859-1:2026 — Annahmestichprobenprüfung anhand attributiver Merkmale.
- ASTM D5094/D5094M-24 — Gross leakage testing for containers with threaded or lug closures.
- ASTM D2063/D2063M-24 — Torque retention for packages with continuous-thread closures.
- ISTA — Distribution test procedures.
- Hagvall et al. — Air oxidation of limonene and linalool.
- Turek and Stintzing — Stability of essential oils: a review.
- Open-access review of essential-oil stability and degradation factors.
- Thermo Fisher Scientific — Chemical resistance guide.
- AromaTools — Orifice reducers FAQ (secondary mechanism and orientation reference).
 English
 Español de Argentina
 Русский
 Italiano
 日本語
 한국어
 العربية
 Français
 Deutsch