
Shampoo Bottle Pump Not Working? Here’s How to Fix It (Causes + Step-by-Step Repair)
Quick answer: Most shampoo pump failures come down to one of five things — a clogged nozzle, a locked or misaligned actuator, a dislodged dip tube, trapped air in the piston chamber, or a worn spring/seal inside the pump head. Nine times out of ten you can fix it in under five minutes without buying a new bottle. If the pump mechanism itself is cracked or the spring has failed, replacing the pump head — not the whole bottle — is usually the cheapest, fastest solution. Below we break down exactly why this happens, how the pump is built, and how to fix or replace it correctly.
 How a Shampoo Bottle Pump Actually Works
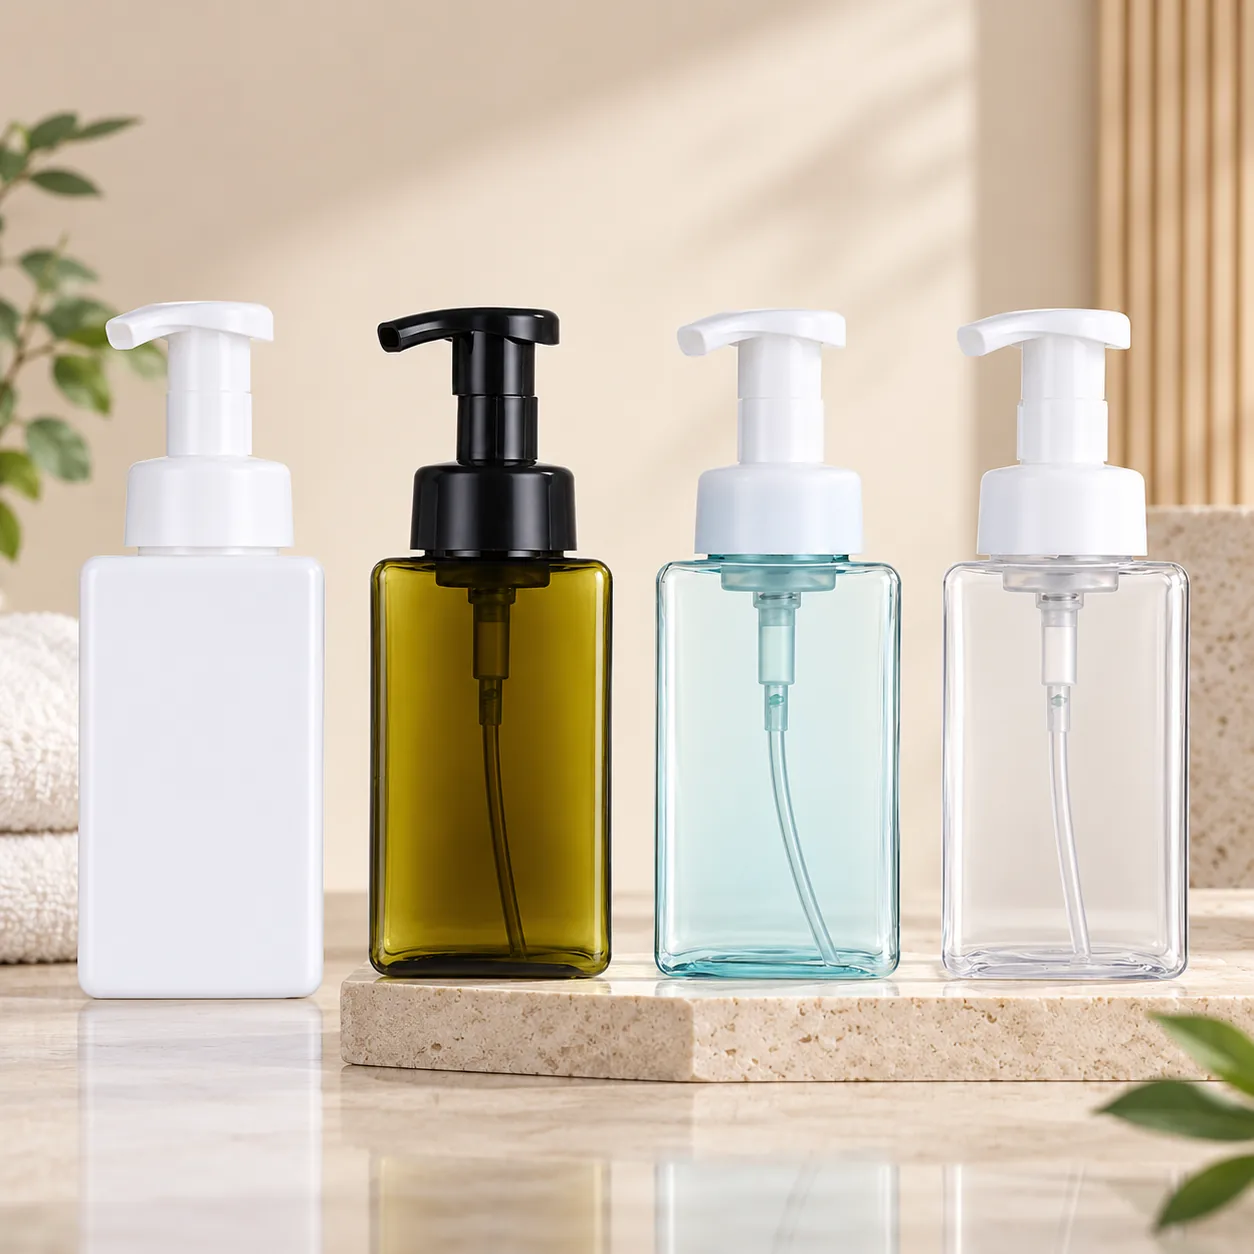
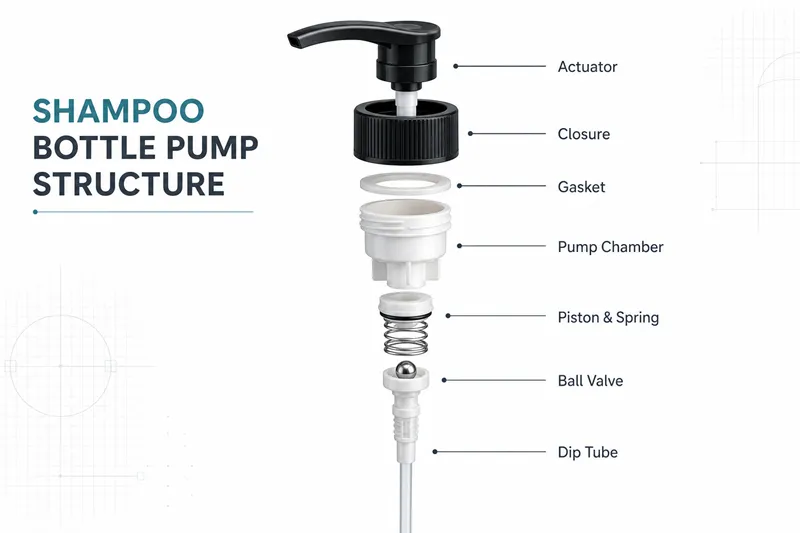
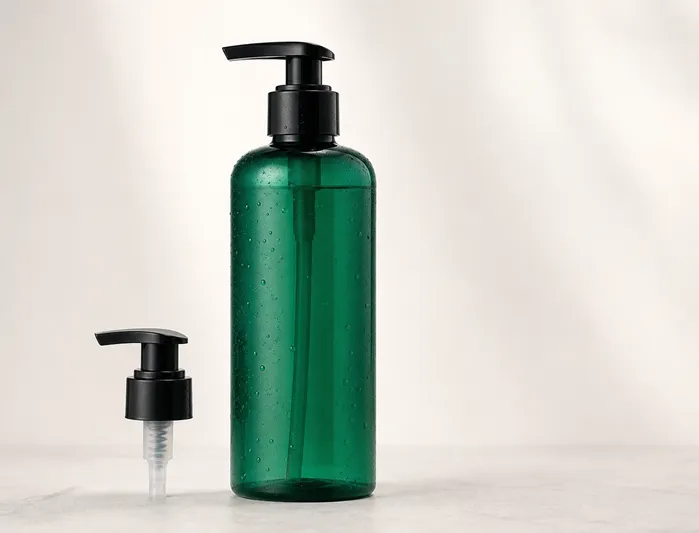
Before troubleshooting, it helps to know what’s inside. A standard lotion/shampoo pump has five core parts working together:
- Actuator (the button/nozzle you press) — pushes down to compress the chamber
- Closure/collar — the ring that screws or snaps the pump onto the bottle neck
- Piston and spring — the piston moves down under pressure, then the spring returns it to draw the next dose
- Ball valve (inlet and outlet) — two small check valves that let liquid flow up but not back down, creating suction
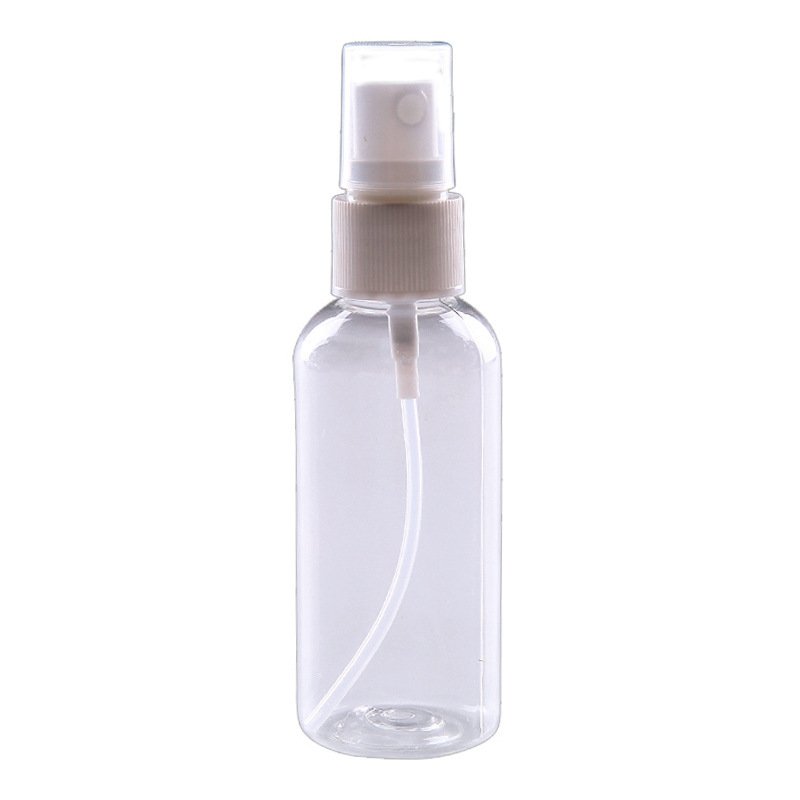
- Dip tube — the plastic straw that reaches to the bottom of the bottle and pulls product up to the pump chamber
Every press is really a small vacuum pump: pressing forces air/liquid out through the outlet valve, and releasing creates suction that pulls shampoo up the dip tube through the inlet valve. If any one of these parts is blocked, cracked, or out of position, the whole cycle breaks down — which is why “not working” can mean several different things depending on which part failed.
Common Reasons a Shampoo Pump Stops Working (and How to Fix Each One)
1. The pump is still in the “locked” position
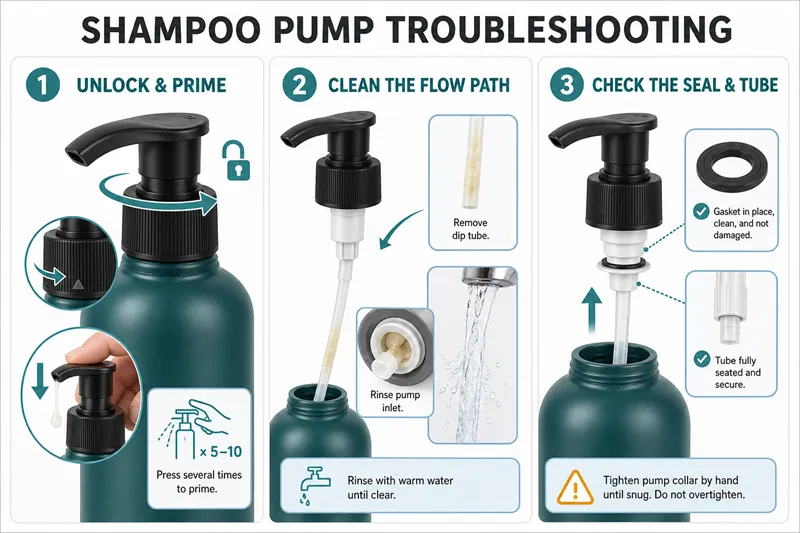
Many pumps have a twist-lock feature so they don’t leak during shipping. If the pump only moves a little or feels stuck, twist the nozzle counter-clockwise (or push down and turn, depending on the design) until it clicks into the unlocked position.
Fix: Rotate the nozzle to align the small arrow or notch with the unlocked marker on the collar.
2. The nozzle or valve is clogged with dried product
Thick shampoo, conditioner, or hand soap residue dries around the nozzle opening and inside the outlet valve, blocking flow.
Fix: Remove the actuator, soak it in warm water for 10–15 minutes, and use a toothpick or pin to clear the nozzle hole. Run warm water through the pump a few times before reattaching.
3. The dip tube has come loose or shifted
If the pump pushes air but no liquid comes out, the dip tube may have popped off the base of the pump or shifted so it’s no longer reaching the bottom of the bottle.
Fix: Unscrew the pump, gently pull out the tube, and press it firmly back onto the pump stem. Trim the tube if it’s bent or kinked so it sits straight and near the bottle’s bottom.
4. Air is trapped in the chamber (common on new or refilled bottles)
A brand-new pump — or one refilled after sitting empty — often needs priming. This isn’t damage, just air where liquid should be.
Fix: Pump 5–10 times continuously without releasing pressure between strokes. This pushes trapped air out and pulls liquid up to replace it.
5. The internal spring or seal has worn out
After months of daily use, the spring can weaken or the rubber gasket around the piston can wear down, so the pump no longer builds enough pressure to dispense.
Fix: This is mechanical wear, not a clog — cleaning won’t help. The pump head needs to be replaced (see the next section).
6. Wrong pump size or thread mismatch
If you’ve swapped a pump from another bottle, a mismatched neck size (e.g., 20/410 vs. 24/410) will sit crooked and never seal properly, causing weak suction or leaks.
Fix: Check the thread size printed on the original pump collar and match it exactly when buying a replacement.
How to Replace a Broken Shampoo Pump: Step-by-Step
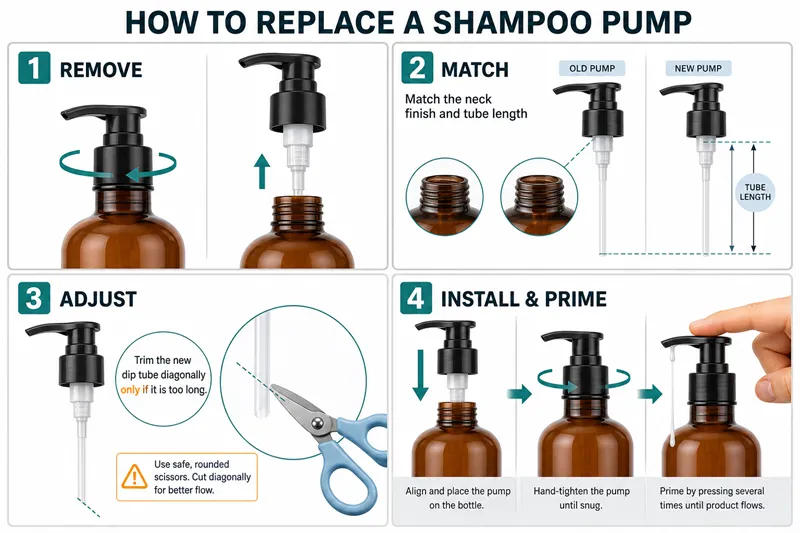
If cleaning and priming don’t solve it, the pump mechanism itself has likely failed. Here’s how to replace it correctly:
- Empty and rinse the bottle so leftover product doesn’t interfere with the new pump.
- Unscrew the old pump collar counter-clockwise. If it’s a snap-fit (not threaded) pump, gently pry it up with your fingers or a flat tool.
- Note the neck size and pump type — check for a size stamp (commonly 20/410, 24/410, or 28/410) on the collar, and note the dip tube length.
- Buy a matching replacement pump in the same thread size and dip tube length, ideally the same style (lotion pump vs. treatment pump vs. foamer, since dosage and pressure differ).
- Trim the new dip tube if needed so it reaches close to the bottom of your specific bottle without touching it (touching the bottom can restrict flow).
- Insert and screw the new pump on clockwise until snug — don’t overtighten, which can crack the collar.
- Prime the new pump with 5–10 full presses before use.
How to Use a Pump Correctly (and Make It Last Longer)
A few simple habits prevent most of the problems above:
- Press straight down, don’t push at an angle. Angled pressure bends the piston stem over time and wears the seal unevenly.
- Wipe the nozzle after use so product doesn’t dry and cake around the opening.
- Don’t leave the pump upside down or on its side for long periods — it lets air into the dip tube and product can leak into the collar and dry there.
- Rinse the pump head periodically (once a month for daily-use bottles) under warm water, especially for thicker formulas like conditioner or lotion.
- Store in moderate temperatures. Very hot conditions (like a car in summer) can soften plastic springs and seals and shorten pump life.
- Match pump strength to product viscosity. A thin pump paired with a thick, high-viscosity formula has to work harder every stroke and wears out faster — this matters most for manufacturers and brand owners choosing packaging, since the wrong pump/formula pairing is one of the top causes of field complaints about “weak” or “broken” pumps.
Frequently Asked Questions
Why does my pump dispense air but no product? Almost always a dip tube issue or an unprimed pump. Check that the tube is firmly attached and reaches the bottle bottom, then prime with several continuous presses.
Can I fix a cracked pump nozzle, or do I need a new one? A cracked actuator or collar can’t be repaired — plastic doesn’t reseal. Replace just the pump head; the bottle itself is usually fine.
Are shampoo pump sizes universal? No. Pumps are sized by neck diameter (commonly 20/410, 24/410, 28/410) and thread pitch. Always match the size printed on your original pump when replacing it.
Why did my pump work fine, then suddenly stop after refilling the bottle? Refilling introduces air into the chamber and dip tube. This is normal — prime the pump with repeated presses rather than assuming it’s broken.
How long does a shampoo pump typically last? For household use, a well-maintained pump usually lasts 1–3 years. For commercial or high-frequency use (salons, hotels), expect more wear and shorter lifespans unless a higher-cycle-rated pump is specified.
Choosing the Right Pump From the Start
If you’re a brand owner sourcing bottles rather than a consumer troubleshooting one at home, most of these failure points — weak springs, mismatched thread sizes, poor dip tube fit, low cycle-life ratings — are avoidable by specifying the correct pump grade and thread size at the manufacturing stage rather than fixing it after complaints come in.

 English
  Español de Argentina
  Русский
  Italiano
  日本語
日本語  한국어
한국어  العربية
  Français
  Deutsch