
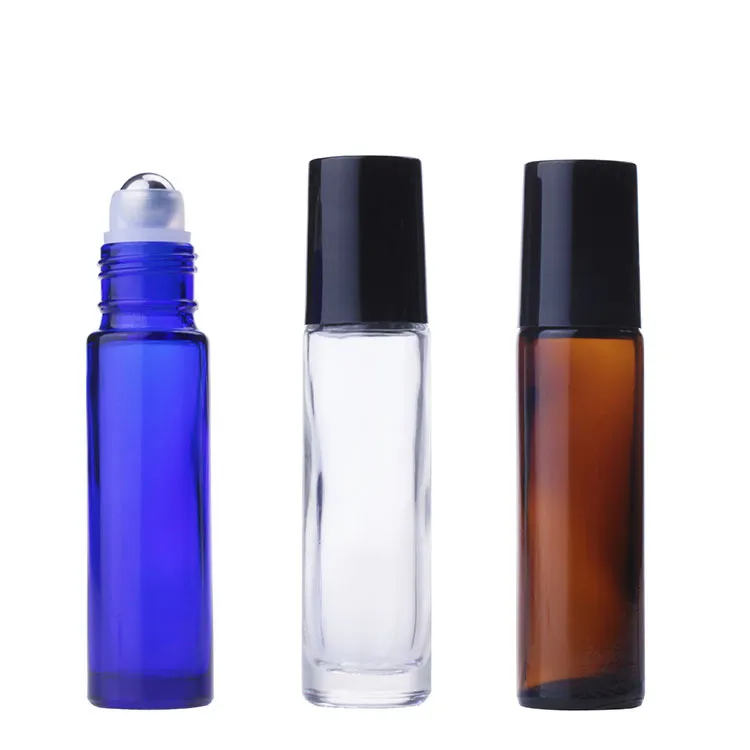
Can You Reuse Essential Oil Roller Bottles?
Short answer: Yes—many glass essential oil roller bottles can be cleaned, refilled and reused if the bottle has no chips or cracks and the roller insert still fits securely. Remove the complete insert, clean and dry every part, refill below the bottle shoulder, press the insert in evenly, then test for leaks. Replace the insert if its housing is distorted, the ball is damaged or it no longer seats firmly. For a product sold to customers, however, a home refill check is not a substitute for formula-compatibility, closure and transport testing.
This guide answers the practical questions people ask after a roll-on runs empty—or starts leaving an oily ring in a bag. It also explains what brands and importers should check when choosing refillable rollerball bottles for an essential-oil or fragrance line.
Can Essential Oil Roller Bottles Be Reused?
A refillable design can usually be reused for the same type of oil-based product. Glass is particularly suitable because its smooth, non-porous surface is easier to clean than a scratched plastic bottle. Amber or other colored glass can also reduce light exposure, although color alone does not make a package indefinitely reusable.
Reuse the bottle only when all of the following are true:
- The glass has no crack, chip, deep scratch or damaged neck thread.
- The roller housing can be removed without splitting and snaps back into the neck securely.
- The ball rotates smoothly after cleaning and has no flat spot, rust, pit or visible damage.
- The cap screws on squarely and is not cracked or stripped.
- The previous contents can be removed completely and the components can be dried before refilling.
Do not reuse a package when you cannot identify the previous contents, when the bottle held a contaminated or spoiled formula, or when oil remains trapped beneath a label or inside a damaged closure. If the bottle will be shared, sold or used around the eyes, hygiene expectations should be higher than for a personal pulse-point blend.
When replacement is the better decision
A bottle is inexpensive compared with the cost of lost formula, stained parcels and customer complaints. Replace the full package if the neck is chipped, the insert can be rocked by hand after installation, the cap no longer closes properly, or leakage continues with a new compatible insert. Never try to “repair” a cracked glass neck with adhesive. Adhesive can contact the formula, interfere with the seal and conceal a break that may worsen in use.
Roller Bottle Structure and How the Ball Works
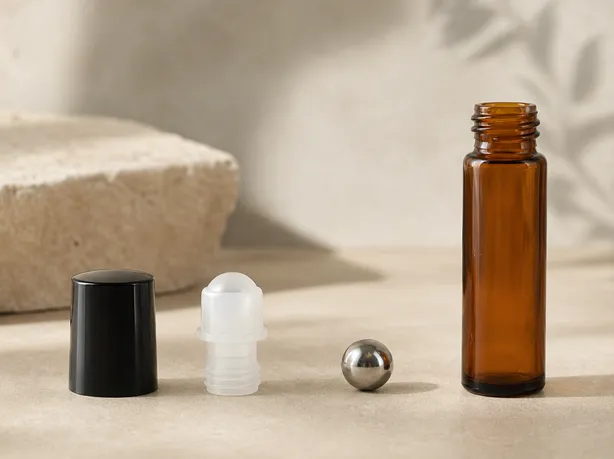
A typical essential-oil roll-on is simpler than a pump. The bottle holds the blend. A press-fit or snap-fit plastic housing sits in the neck and retains a stainless-steel, glass or plastic ball. The cap protects the applicator, limits accidental rolling and may help compress the closure system when tightened.
When the bottle is inverted, liquid reaches the inner surface of the ball. Skin friction rotates the ball inside its socket, carrying a thin film from the wet side to the outside. The small clearance between ball and housing, together with the product’s viscosity and surface tension, controls the output. That is why the same insert can feel dry with a thick serum but dispense too freely with a very thin oil.
The ball is not always the primary seal. The fit between the insert and bottle neck, the geometry around the ball, and the cap all matter. A smooth ball in an oval, damaged or partially seated housing can still leak. For commercial projects, the complete bottle–insert–cap–formula combination should be evaluated rather than approving each component in isolation.
How to Refill Essential Oil Roller Bottles
Work over a washable surface with good lighting. Prepare a purpose-made essential-oil bottle opener or a small plastic insert-removal tool, mild unscented dish soap, warm water, lint-free wipes, a narrow funnel or pipette, and a clean tray. Avoid knives and sharp metal screwdrivers: they can slip, chip the rim or gouge the plastic insert.
Step 1: Empty and inspect the bottle
Use or decant the remaining blend. Wipe the outside and inspect the glass neck before applying leverage. If the bottle is chipped, stop and discard it according to local glass-waste guidance. Note the original formula so you do not accidentally mix incompatible fragrances or ingredients.
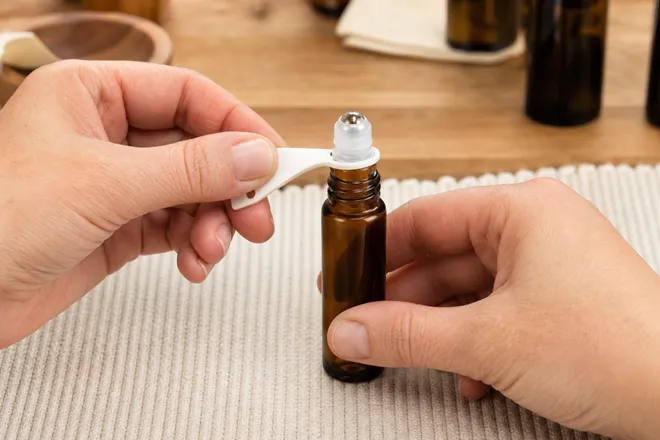
Step 2: Remove the complete rollerball insert
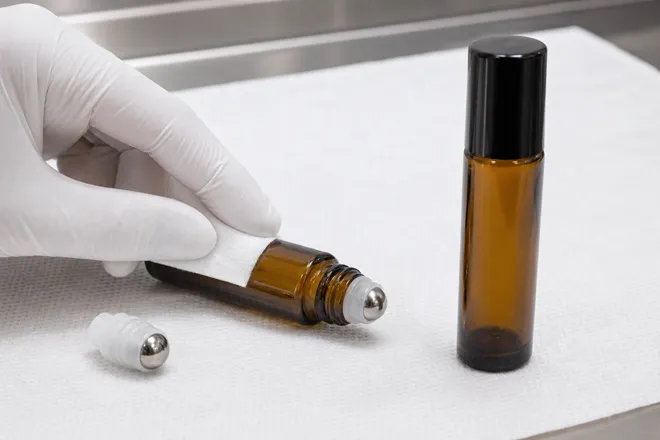
Take off the cap. Hold the bottle upright on a non-slip mat. Slide the notch of a plastic opener under the insert’s outer flange and lift gradually. Rotate the bottle and repeat from another side if necessary so the housing rises evenly. Remove the ball with its housing; do not pry the ball out of the socket while the insert is still installed.
Step 3: Wash the reusable components
For a personal oil blend, wash the empty glass bottle, cap and removable insert separately with warm water and a small amount of mild unscented detergent. Roll the ball against a clean gloved fingertip while rinsing so residue around the socket is released. Do not use boiling water or move cold glass directly into very hot water; thermal shock can crack it.
If odor or oily residue remains, repeat the wash rather than masking it with the new blend. Alcohol may be suitable for some components and residues, but it is not universally compatible with every plastic, decoration or formula. Check the supplier’s material guidance before using a solvent. Cleaning removes soil; it does not automatically create a sterile package.
Step 4: Dry completely
Place the parts upside down on a clean lint-free surface where air can circulate. Allow them to dry fully. Water droplets can cloud an oil blend, support microbial growth in formulas containing water and alter dispensing. Do not push a paper towel into the bottle; fibers may remain inside and reach the roller.
Step 5: Prepare the refill
Use a blend intended for topical roll-on application and follow the formulation or safety guidance supplied for its ingredients and intended user. Concentrated essential oils should not be treated as automatically skin-safe. Dilution depends on the oil, user, application area and professional guidance, so this packaging article does not prescribe a universal drop count.
If you are changing formulas, prepare the blend in a separate clean vessel. That makes measurement easier and prevents concentrate from coating the bottle neck. For product developers comparing container options, Boyu’s essential oil bottle range provides a useful starting point alongside roll-on formats.
Step 6: Refill without overfilling
Set the dry bottle upright and add the blend with a pipette or narrow funnel. Leave space below the shoulder or neck for the displaced volume of the roller insert and for liquid expansion. If oil coats the rim, wipe it away before assembly. Overfilling is a common reason a correctly made bottle appears to leak immediately after refilling.
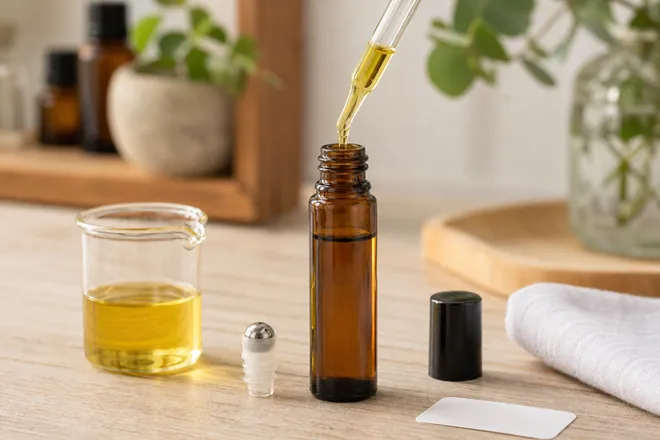
Step 7: Reinstall the rollerball insert
Confirm that the insert and bottle neck are dry and free from fibers. Center the complete insert over the opening. Press straight down with clean fingers or a flat installation tool until the flange is level and fully seated all the way around. Do not press on one edge only. Some designs can be seated by tightening the matching cap, but do this only if the packaging supplier confirms that method; an unsuitable cap may deform the insert.
Step 8: Prime, label and leak-test
Tighten the cap, gently invert the bottle and return it upright. Roll on a clean test surface until the ball is evenly coated. Wipe the neck and cap completely dry, then leave the bottle upright on white absorbent paper. After the first check, place it horizontally in a sealed secondary container for a short observation period. Any fresh oily halo shows that troubleshooting is still required. Label the bottle with the contents and refill date.
Why Is My Roller Bottle Leaking?
Leakage does not automatically mean the ball is broken. First identify where the oil appears. Product on the center of the ball suggests a ball-to-housing or viscosity issue. Oil emerging below the insert flange points to a neck-fit or seating problem. Oil inside the cap can result from overfilling, storing the bottle on its side, temperature changes or residue left after application.
Seven common causes
- The insert is not fully seated. Even a small raised section can open a path between the housing and glass neck.
- The bottle is overfilled. Inserting the roller displaces liquid upward, while heat can expand the contents later.
- The formula is too thin for the dispensing clearance. Component tolerances and product properties must be matched.
- Residue is trapped around the ball or neck. Dried product can stop the ball from returning smoothly or prevent the flange from sitting flat.
- The housing is distorted or worn. Repeated aggressive removal, heat or incompatible ingredients may change its shape.
- The ball is scratched, pitted or contaminated. A damaged surface may dispense unevenly and compromise contact with the socket.
- The cap, neck or threads are damaged. A cross-threaded cap or chipped finish cannot provide reliable closure performance.
Clean and dry the exterior, reseat the insert once, reduce the fill level if necessary and test again. If leakage returns, replace the compatible insert. If a new insert also leaks, replace the whole bottle rather than improvising with tape, glue or a random ball size.
Can the Rollerball Be Replaced?
Usually, the practical replacement part is the complete rollerball insert—the ball already assembled in its plastic housing. Replacing only the loose sphere is risky because ball diameter, roundness, surface finish and socket clearance affect both output and leakage. A ball that looks identical may not be dimensionally compatible.
Detailed removal and replacement steps
- Empty the bottle and clean oil from the outside so your grip is secure.
- Check the glass neck for damage and place the bottle upright on a non-slip pad.
- Remove the cap and position a plastic opener beneath the roller insert flange.
- Lift gently, moving around the circumference until the complete insert releases.
- Compare the old and replacement inserts: neck-fit diameter, flange position, overall height, ball material and cap clearance should match.
- Clean and fully dry the bottle if it will be reused.
- Fill below the shoulder and wipe the sealing surfaces.
- Center the new assembled insert and press vertically until the flange is uniformly flush.
- Install the matching cap, prime the ball and perform an upright and horizontal leak check inside secondary containment.
What Brands and Importers Should Specify
A consumer may successfully refill one bottle, but a brand needs repeatable performance across production lots and real distribution conditions. In an RFQ, define bottle capacity, brimful and recommended fill volume, glass color, neck finish, ball material, housing resin, cap construction, formula type and expected storage orientation. Ask whether the insert is designed for removal and reuse; not every press-fit component is.
Send the actual formula—or a representative test formula—to the packaging partner. Evaluate dispensing after storage, not only on the day of filling. Useful checks include insert retention, rolling smoothness, output consistency, upright/inverted leakage, cap fit, controlled temperature exposure and transport simulation. Decoration and label adhesive should also be checked because a small oil migration can stain print or lift a label before the leak is obvious.
Importers should approve a complete matched set and avoid sourcing bottles, inserts and caps solely by nominal size from unrelated suppliers. Request pre-production samples, document the approved components, and agree on incoming inspection criteria. Boyu’s 15 ml glass roller bottle illustrates one commercial format, while the company overview explains the broader OEM/ODM packaging scope. Specifications and test plans should still be confirmed for each project.
Essential Oil Roller Bottle FAQs
How many times can I reuse a roller bottle?
There is no responsible universal number. Reuse depends on the glass condition, insert retention, formula compatibility, cleaning method and handling. Inspect the package each time and replace it at the first sign of damage, poor fit, persistent odor or leakage.
Do I need to remove the metal ball itself?
No. Remove the complete insert from the bottle neck. The ball is retained by a precisely fitted housing; prying out only the ball can deform the socket and create a leak.
Why has the rollerball stopped moving?
Dried residue, fibers, a formula that is too viscous, a dented ball or a distorted housing can cause sticking. Remove and clean the insert, allow it to dry, then test it without forcing the ball with a sharp object. Replace the insert if rotation remains uneven.
Can I refill the bottle with a different essential-oil blend?
Yes, if the old contents can be removed completely and the new blend is suitable for the bottle, insert and intended skin use. Persistent odor or residue can alter the new blend; in that case, use a new package.
Should roller bottles be stored upright?
Upright storage reduces prolonged liquid contact with the applicator and is the safer default, especially after a refill. Keep the cap closed and store the bottle away from heat and direct light. A travel product should still be tested in the orientations it may encounter in use.
Is a stainless-steel or glass rollerball better?
Neither is automatically best. Stainless steel gives weight and a cooling feel; glass offers a smooth, non-metal contact surface. The correct choice depends on formula compatibility, desired output, sensory target and the housing design. Test the complete assembly with the actual formula.
What information should I send when requesting a quote?
Include capacity, annual quantity, target market, formula type, desired ball material, glass color, decoration, cap style, refillability expectations and required testing. If you are selecting packaging for a new roll-on line, contact Boyu Packaging with those details to discuss compatible samples and a project-specific quotation.
Final Check Before You Reuse the Bottle
A reusable roller bottle should be visibly undamaged, clean, completely dry, correctly filled and firmly reassembled. The ball should rotate smoothly without flooding, and no fresh oil should appear around the ball, insert flange or cap during the observation check. When any of those conditions cannot be met, replace the insert or the full package. That small decision protects the formula, the user’s belongings and—on a commercial product—the brand behind it.

 English
  Español de Argentina
  Русский
  Italiano
  日本語
日本語  한국어
한국어  العربية
  Français
  Deutsch